To publish your personalized video to the public, it first needs to be rendered. This article explains how that is done using INDIVIDEO.
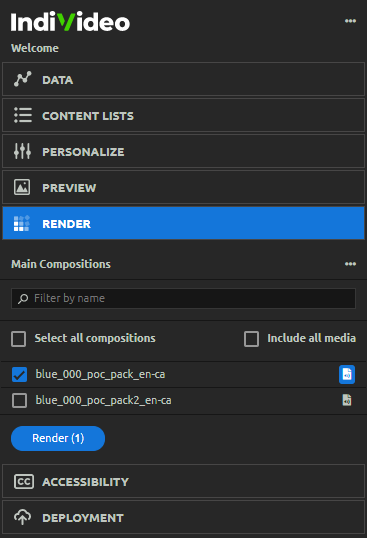
The Render Tab works in a similar way as the Preview Tab; however, it will only include the main compositions contained in the _OUTPUT folder of the AE project. These are the same used to render the final personalized videos and their associated assets for later upload during the deployment stage.
The final video rendered will be composed of two main layers:
- A vector-based layer containing an SVG animation,
- A media-based layer containing either an audio or a video file.
A personalized video can be rendered in two different modes, an audio mode and a video mode. Choosing the render mode depends on the client needs or on the aesthetic preferences of the motion designer. Each render mode comes with its own set of advantages and limitations. Choosing the correct one will render the exact requirements.
These modes are referred as the Media Type in the Render Tab and in the Project Settings section, and only affect how the video is rendered. The render mode can be changed at any time without affecting the AE project.
|
Media Type IndiVideo provides the freedom to switch from a media type different to the one specified on the Project Settings. If the Audio type is selected, 100% of the personalized video visual is included within its vector-based layer. In this case, the media-based layer is driven by an audio file. If the Video type is selected, only personalized-driven AE layers are included within the vector-based layer. The rest is rendered as part of a video file. The “Video” type needs to be selected to render and deploy a non-personalized video. Manage Layers Automatically Activating this checkbox allows IndiVideo to manage which layers to activate or not during the rendering phases. Filter By Name If the compositions list is too long making it difficult to find the exact composition to render, typing text into the input field filters and reduces the list to compositions containing the exact text in their names. An example is to filter the list to a specific language code by inputting the language as mentioned in compositions names. Select Render more than one composition at one time, or just select a specific composition from the list. Render All Media Render all compositions media-based layers by checking the “Render All Media” checkbox. Target specific compositions by activating or deactivating the media icon displayed on the right side of every composition in the list. |

When rendering through IndiVideo, multiple video assets are generated at the same time including:
|
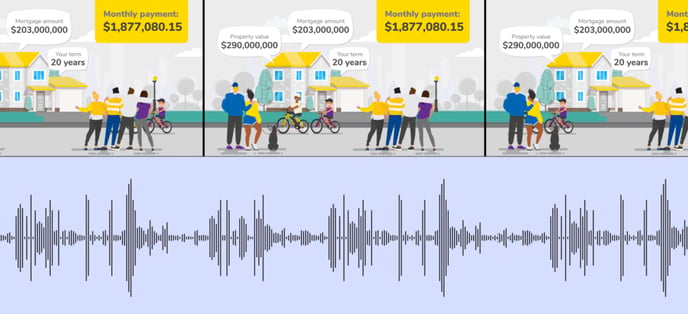
Rendering In Audio Mode
| Under the audio mode all the visual information must be included within the vector-based layer. In this mode, an audio file is used by IndiVideo as the media-based layer. |  |
PROS and CONS of using this approach include:
- Lighter size of the rendered video and all its associated assets,
- Does not require any AE layers manipulation when rendering,
- Video effects and some scripts are not currently supported by the SVG format,
- Requires some optimization to ensure that the re-interpretation of the video in SVG is accurate and to avoid performance issues while the end-user is watching the personalized video.
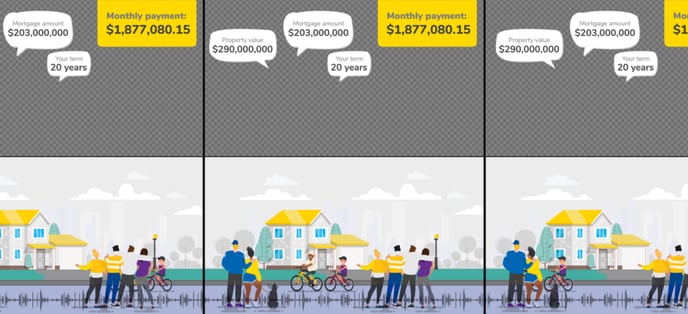
Rendering In Video Mode
 |
If video mode is chosen, only the personalized layers associated with data-points are included within the vector-based layer. The rest of the visual assets (non-personalized) is rendered as part of the video file generated through the render process. |
PROS and CONS of using this approach include:
- No limitation in the creative effects used in the media-based layer,
- Little optimization required in the AE project to deliver a fully functional personalized video to the end-user,
- Requires AE layers manipulations when rendering (Manual or Automatic),
- Cannot be fully tested using the AE Preview tab considering that it is currently limited to vector-based information.
Personalized Video Vs Generic Video
|
Despite the AE extension being primarily focused on creating personalized videos, a generic video can also be deployed if the project meets the following conditions:
|
 |
Video rendering workflow
Partial Render Vs Full Render
Because video rendering can be a long process, IndiVideo allows the activation and deactivation of the media-based layer during the rendering phase. This is especially useful to tweak and re-render the vector-based layer multiple times without re-rendering the media-based layer of the personalized video.
Video Optimization For Web
The IndiVideo extension does not currently optimize the rendered media files for the web. Completing a video render in the AE Extension leads IndiVideo to generate a certain number of uncompressed media files on a drive. Those files are MOV if the video is rendered using the “Video” mode or “WAV” if the video is rendered using the “Audio” mode. The files are found in a folder called “watch”. They are accessible from the three dots menu in the Render Tab by clicking on the “Open Render Output Location”.
Using Adobe Media Encoder (or any other preferred video rendering software), convert MOV files from the “watch” folder to an appropriate MP4 file or any WAV file in an appropriate MP3 file. By default, using the following pre-sets for any MP3 and MP4 produced for IndiVideo is recommended to ensure everybody accessing a personalized video gets the most optimal video experience. These include:
Recommended Pre-sets For Video Files:
- MP4: H.264, Variable Bitrate 2 Pass (VBR 2 pass),
- Profil: High or Main, 1.5 to 2.44 Mbits/sec, 1 keyframe every 30 frames.
- Audio using AAC Version 2, 44100 Hz, 128 Kbits/s, Stereo, Quality: High or Medium
Recommended Pre-sets For Audio Files:
- MP3: 128 Kbits/s, Stereo,
- Quality: High or Medium
To allow the video deployment to work as expected, the web-optimized files must be within the “watch” folder. If the MP3/MP4 files are generated using the Adobe Media Encoder watch folder feature, the rendered files do not need to be moved at the root of the “watch” folder as IndiVideo knows how to find the required files in the sub-folder created by Adobe Media Encoder.
.png?height=120&name=IndiVideo%202024%20Logo%20(2).png)